Part 2: Workflow Verification
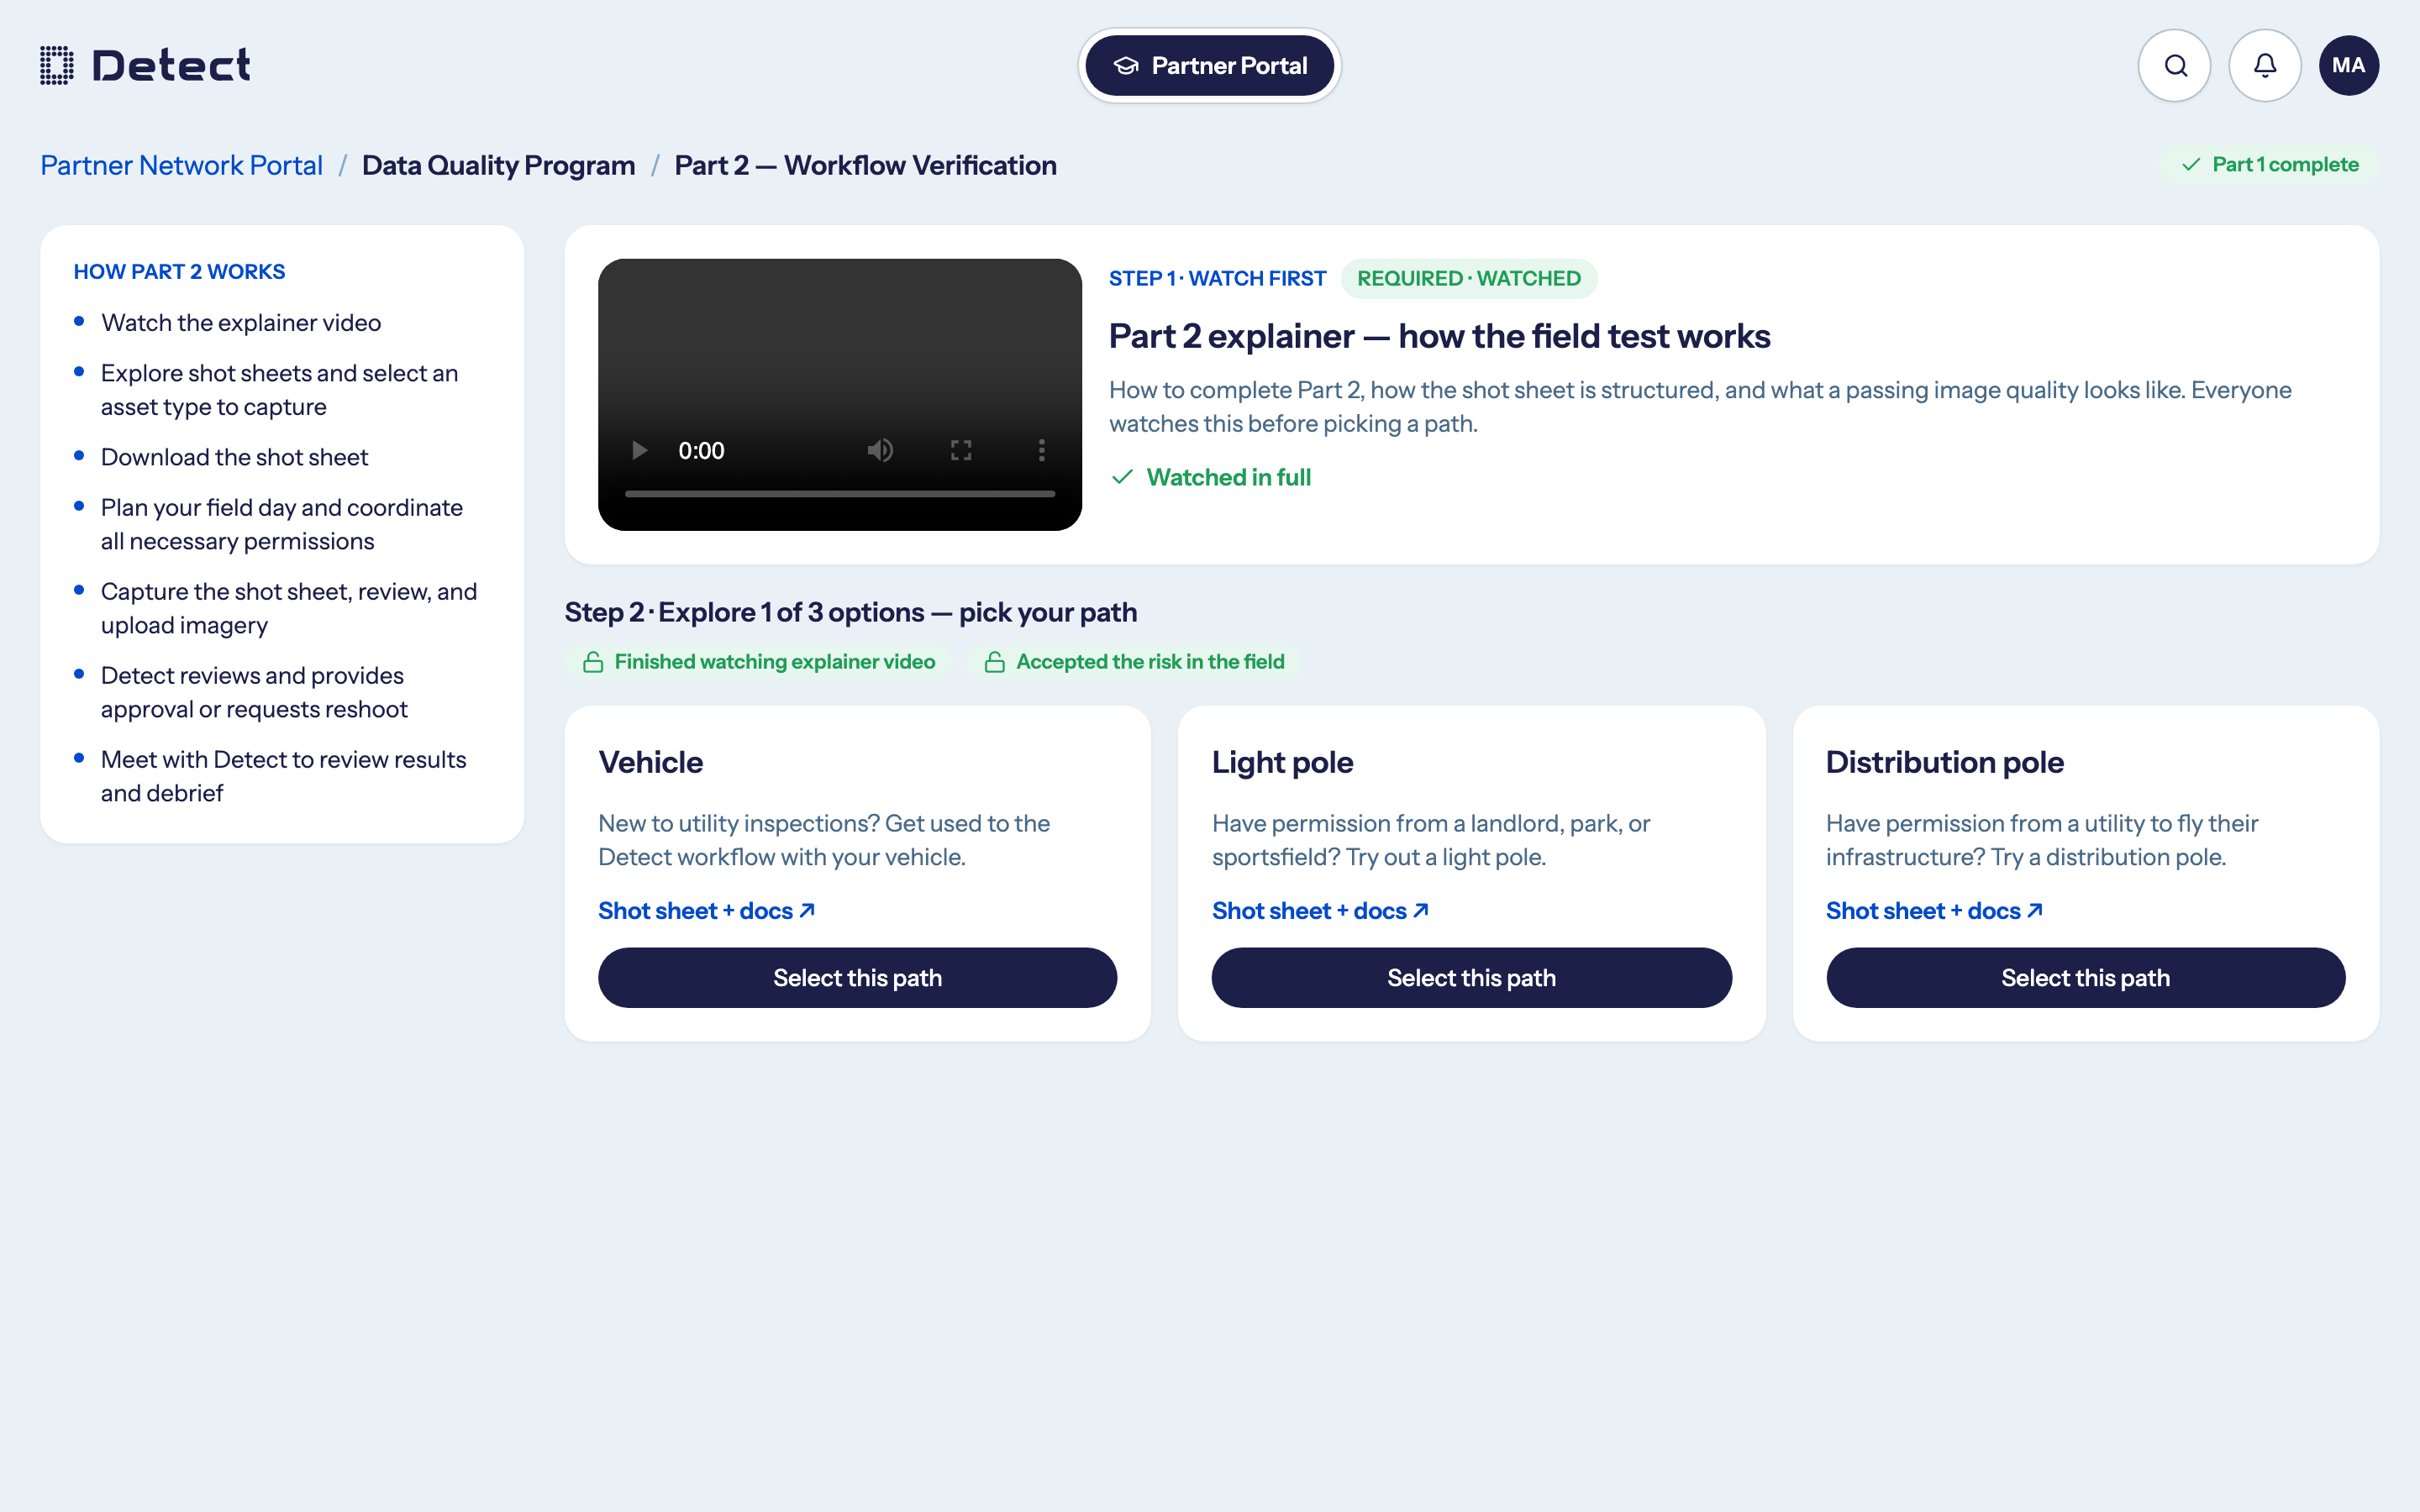
Part 2 is a field test. You choose an asset type, capture it following Detect's shot sheet, upload the imagery, and Detect reviews it. You can start Part 2 once you have passed Part 1.
How Part 2 works
- Watch the explainer video.
- Explore the shot sheets and choose an asset type to capture.
- Download the shot sheet.
- Plan your field day and get every permission you need.
- Capture the shot sheet, review your images, and upload them.
- Detect reviews the imagery and either approves it or asks for a reshoot.
- Meet with Detect to review the results.
Step 1: Watch the explainer
Open Part 2 — Workflow Verification from the portal home. Watch the explainer video in full. It covers how the shot sheet is structured and what passing image quality looks like. Everyone watches it before choosing a path.
Accept the risk in the field
Every time you open Part 2, a banner reminds you: You assume all risk in the field. Under Part II of the terms, you are responsible for the flight authorisation your operation needs, liability insurance, and every permission your subject and location need. You decide whether it is safe and lawful to fly.
Click Accept to continue.
Step 2: Choose your path
Choose one of three paths:
| Path | Best for |
|---|---|
| Vehicle | New to utility inspections. Practise the Detect workflow with your own vehicle. |
| Light pole | You have permission from a landlord, park or sports field. |
| Distribution pole | You have permission from a utility to fly their infrastructure. |
Click Shot sheet + docs on a path to read or download its shot sheet. When you are ready, click Select this path.
Choosing a different path later starts over: the location pin and any imagery from your current path are removed.
Step 3: Set the asset location
Drop one pin where you will fly. Approximate is fine.
- Drag the pin, click the map, type an address or coordinates into Pin location, or click Use my current location.
- Check the Project name and Asset type.
- Click Confirm location & continue.
You must confirm the location before you can upload. You can still drag the pin afterwards, until you submit.
Step 4: Upload your imagery
- Drag your capture folder onto the upload area, or click Browse for a folder. Subfolders are included, non-image files are ignored, and duplicate frames are skipped.
- Check the summary, then click Start upload.
- Keep the tab open while it uploads. You can Hold and Resume, and if you go offline, the upload picks up where it left off.
Supported formats include JPEG, PNG, TIFF, HEIC, WebP, DNG, and common camera RAW formats (CR2, CR3, NEF, ARW, RAF, ORF, RW2).
Faces and number plates in your images are blurred automatically.
The location check
As you upload, DetectOS checks each image's GPS position against your pin. Every image that has GPS must be within 150 m of the pin. If some are not, you will see Needs attention, and you cannot submit until you either drag the pin to where you actually flew or remove the stray images. Images with no GPS data are never held against you.
The other quality checks (Blur check, Duplicate detection, Exposure and Shot-sheet coverage) are Detect's own review results. They show Not yet run until Detect has reviewed your submission.
Step 5: Submit for review
Click Submit for review. Detect is notified and you receive a confirmation email that includes the date Detect's decision is due. Once submitted, your pin and imagery can no longer be changed.
You can only have one Part 2 submission open at a time.
Submission statuses
| Status | What it means |
|---|---|
| In progress | You are still working on it. Only you can see it. |
| Submitted · with Detect | Waiting for a reviewer. |
| With Detect · in review | A Detect reviewer is reviewing it now. |
| Approved | Part 2 is complete. Your Part 2 certificate is issued. |
| Reshoot requested | Detect needs you to capture it again. |
If Detect asks for a reshoot
You get an email and an in-app message with Detect's comments. Read what Detect found, then click Start new submission to fly the path again. Part 2 stays open until a reshoot is approved.
When you are approved
You are now certified. Detect will contact you to arrange a meeting to review your experience and talk about next steps. Your Part 2 certificate is on the Data Quality Program card on the portal home.